How to Fix DTF Transfer Cracking or Peeling After Washing?
Dtf peeling after washing describes a dtf print lifting, cracking, or flaking because the ink and adhesive did not bond properly to the fabric during the transfer process or failed during care.
Introduction
You can fix most issues with a simple checklist, including checking the heat press settings . Calibrate temperature with a surface thermometer, set consistent pressure across the platen, verify press time with a reliable timer, and follow care instructions. Run a quick pre press to remove moisture, then confirm peel type and adhesive powder cure before production to prevent dtf peeling after washing.
Work in small tests before a new batch. Press two sample tees at slightly different settings, perform a fast wash test in cold water, and compare adhesion and color hold. If clients ask, do dtf transfers crack, you will have data that shows how correct settings protect edges and fine lines through multiple washes, reducing poor adhesion .
This guide gives quick diagnostics first, then practical steps to regain adhesion and preserve durability. You will find simple fixes for temperature, time, and pressure, plus care tips that reduce wear in the drum. For hard goods, consider uv dtf transfers, and for apparel runs, keep a labeled dtf transfer log so every operator can repeat the same results using the heat press .
Understanding DTF Transfer Printing
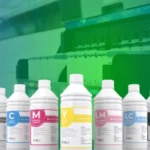
Direct to film printing lays color and white ink on a film, coats it with adhesive powder, cures the layer, and transfers it to fabric with heat and pressure. A clean press gives a stronger bond.
The transfer relies on three values. Temperature activates adhesive, pressure embeds ink and powder into fibers, and time completes fusion. Off by a little in the heat settings can reduce dtf transfer durability.
Summary
- Control temperature, pressure, and time.
- Cure the film fully before pressing to the fabric.
- Keep surfaces clean for optimal adhesion.
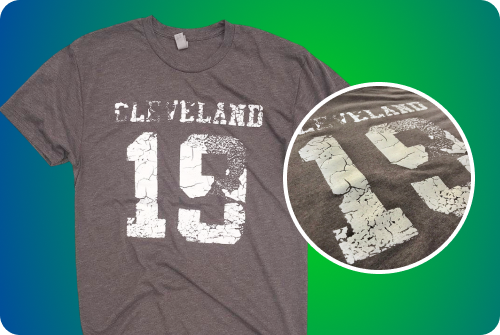
Common Causes of DTF Transfer Cracking and Flaking
Provide direct answers first. Most problems trace to settings, curing, or care.
- Incorrect temperature: Low heat causes weak adhesion. High heat scorches or makes ink brittle.
- Insufficient pressure: Uneven pressure or too much pressure both create failures. Aim for consistent pressure across the platen.
- Inadequate press time: Short cycles leave incomplete adhesion.
- Poor curing: Adhesive powder undercooked or overcooked reduces bond.
- Moisture in fabric: Skipping pre press traps steam.
- Cold spots on platen: Uneven heat distribution creates lift areas.
- Ink and film issues: Low quality ink, clogged printheads, or uneven distribution of powder hurt the layer.
- Care problems: Hot water, strong detergents, and high heat dry cycles accelerate damage.
Quick Table, Symptoms and Likely Causes
Corners lift after a single wash
- Likely cause, incomplete adhesion, low heat, short time
- First fix, add 2 seconds press time, verify temperature with a contact thermometer
Hairline cracks across chest
- Likely cause, excess heat, brittle ink layers
- First fix, lower temperature, reduce time, add a light post press with parchment paper
Patchy stick in center
- Likely cause, uneven pressure, worn pad
- First fix, shim or replace pad, set pressure settings evenly
Peel tears the print
- Likely cause, wrong peel temperature, rushing peel time
- First fix, let prints cool completely for cold peel, or check hot peel timing
Dull or faded look
- Likely cause, overcure or high heat dry cycle
- First fix, reduce curing temperature, air dry garments
Summary
Small corrections solve most cases, and avoiding harsh detergents can help maintain quality . Measure temperature carefully, apply even pressure, and validate press time with fabric tests.
Pre-Treatment and Application for Better Adhesion
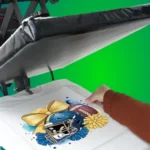
Start with surface prep. Pre press 3 to 5 seconds to remove moisture and flatten fibers. Lint roll for a smooth surface.
Place the film square on the centerline. Use parchment paper or a guard sheet to protect the face. Apply firm pressure only when the fabric requires it. For light garments, use medium pressure.
Cure the film properly before pressing to the fabric. Follow the recommended settings for adhesive powder, then let the film cool on a flat table. Avoid stacking films while ink is warm or tacky.
Summary
- Pre press to remove moisture.
- Align accurately for full contact.
- Cure film correctly before garment press.
Tips for Long-Lasting DTF Prints
Use stable baselines for settings and record them for each blank brand. Maintain the heat press machine and pads for even contact.
- Verify temperature range with a surface thermometer.
- Use even pressure from edge to edge.
- Keep time settings consistent across sizes.
- Choose high quality inks for better adhesion and color.
- Allow a brief post press to smooth texture and seal edges.
For hard goods, testuv dtf transfers on coated mugs, bottles, and cases. For apparel programs with volume, plan a stock of each dtf transfer size and keep settings documented for repeatable output.
Summary
Process beats guesswork. Calibrate, document, and repeat the same steps for every run.
Washing and Care Instructions for DTF Garments
Care affects the final product as much as settings. Simple changes extend life through multiple washes.
- Wash inside out in cold water with a mild detergent.
- Avoid strong detergents and bleach.
- Do not use high heat in the dryer. Air dry or use low heat.
- Do not iron directly on the print. Use a pressing cloth if needed.
- Wait 24 hours after pressing before the first wash.
Summary
Cold water, gentle cycles, and low heat reduce stress on the bond and prevent early failures.
Troubleshooting DTF Transfer Issues
Direct fixes first, then refine.
- Edges lift after wash: Increase press time by 2 seconds, confirm right temperature at the platen, and re-press with parchment paper.
- Spider cracking: Lower temperature or time, reduce firm pressure, and retest.
- Transfer sticks unevenly: Check pad condition, increase even pressure, and verify alignment.
- Peel tears artwork: Check peel type, cold peel or hot peel, then adjust peel time.
- Faded or chalky look: Reduce curing temp for adhesive powder, ensure proper curing without overbaking.
- Persistent failures on one size: Measure for cold spots and shim the platen for even distribution.
Summary
Change one variable at a time. Start with temperature, then time, then pressure.
Conclusion
You can stop dtf peeling after washing with a structured checklist. Verify temperature, maintain even pressure, and set an accurate press time. Cure film correctly, pre press to remove moisture, and use gentle care.
For variety beyond apparel, explore uv dtf transfers for hard surfaces. For scale, standardize every dtf transfer setting so operators hit the same results on every press.
FAQ
How do I prevent my DTF prints from cracking or peeling?
Control temperature, time, and pressure. Use even pressure and proper curing. Wash inside out in cold water and avoid strong detergents. Address incomplete adhesion quickly with a short re-press.
What’s the ideal temperature for curing DTF powder?
Follow the film and powder manufacturer. Most products cure inside a moderate range. Overcure can cause brittle ink, undercure can leave weak adhesion. Test with small swatches before production.
How many washes should a DTF print last?
With correct settings and care, a quality print can last many cycles. Use cold water, mild detergent, and low heat. Monitor samples through multiple washes to verify durability for each blank brand.