Dtf heat press settings are the temperature, pressure, and time values used to bond a dtf film to fabric so the design adheres cleanly and lasts.
You want consistent results across different materials. Set a clear baseline, verify with tools, and adjust only when the fabric, finish, or artwork demands it.
Introduction
DTF is flexible, fast, and durable. The right dtf settings heat press choices turn good prints into great products. Focus on temperature control, even pressure, and accurate press time for optimal results.
This guide uses short steps, quick tables, and plain language. Follow the sections in order, then save presets so your team repeats the same quality.
Dial in dtf heat press settings by verifying platen temperature with a contact thermometer, checking for high pressure balance at the corners, and timing the cycle with a reliable timer. For cotton, polyester, and blends, start with conservative temps, then adjust in small steps to protect hand feel and edge clarity, a measured approach prevents overcure or weak adhesion.
Match heat press settings for dtf to material thickness and ink coverage. Heavy artwork holds heat longer, so shorten peel windows or add a brief post press to seal fibers. Light garments benefit from lower heat and steady pressure, thick hoodies often need firmer pressure and a touch more time for a smooth peel.
Create shop presets that label fabric, temp, pressure, and time, then log the recommended settings and outcomes for repeatable quality. When you scale production, keep a standard for dtf transfer heat press settings that operators can follow on any press, consistent inputs lead to consistent results.
If you expand beyond apparel, test small batches and note the peel behavior before full runs. For hard goods, consider uv dtf transfer solutions, and for high volume apparel programs, plan capacity with wholesale dtf transfers so settings and throughput stay predictable.
Understanding DTF Heat Press Settings
Start with the three pillars. Temperature controls ink activation, pressure controls bond, and time controls fusion.
- Heat
Keep the platen inside a stable temperature range. Confirm with a surface thermometer, not just the display. Watch heat distribution across corners.
- Pressure
Apply even pressure from center to edge. Medium pressure fits most tees, firm pressure helps thicker hoodies. Uneven pressure causes weak adhesion.
- Dwell Time
Press time varies depending on material type and ink load. Add a second or two for thick seams or raised textures. Reduce time for delicate fabrics.
Quick Summary
- Set a baseline temperature carefully.
- Use even pressure for proper adhesion.
- Match press time to the fabric and design density.
DTF Heat Press Settings for Different Fabric Types
Provide direct answers first. Use these starting points, then proof and adjust.
Polyester
- Temperature, 285–305°F
- Pressure, medium pressure
- Time, 10–15 seconds
- Notes, lower temperature reduces dye migration on bright colors.
Cotton
- Temperature, 305–320°F
- Pressure, medium to firm pressure
- Time, 12–15 seconds
- Notes, cotton tolerates more heat, watch for moisture.
Blends (Cotton/Polyester)
- Temperature, 295–310°F
- Pressure, medium pressure
- Time, 12–15 seconds
- Notes, cotton poly blends balance durability and dye stability.
Nylon
- Temperature, 275–295°F
- Pressure, light to medium pressure
- Time, 8–12 seconds
- Notes, use a guard sheet and test a corner. Nylon prefers lower heat.
Table, Starting Points
FabricTemp (°F)PressureTime (s)Notes
Polyester 285–305 Medium 10–15 Reduce migration with lower heat
Cotton 305–320 Medium–Firm 12–15 Pre press for moisture
Blends 295–310 Medium 12–15 Balance dye stability and bond
Nylon 275–295 Light–Medium 8–12 Use guard sheet, test first
Summary
Choose the lowest working temperature for the fabric. Keep pressure settings consistent. Adjust time in small steps for smooth peel and clean edges.
Factors That Can Affect Heat Press Settings
- Heat distribution: Corners may read cooler. Use a contact thermometer.
- Platen size and thickness: Larger platens can lose heat faster during repeated cycles.
- Garment color and finish: Deep dyes and coatings may need lower temperature.
- Artwork density: Heavy coverage holds more heat and needs a careful peel time.
- Environment: High humidity adds moisture. Pre press helps wet ink concerns and reduces steam.
- Equipment state: A worn pad reduces even pressure. Replace when impressions look uneven.
Summary
Control variables you can measure. Verify platen temperature, check pads and covers, and keep a log of changes.
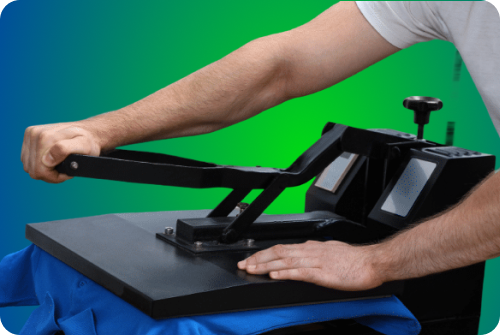
Step-by-Step: How to Apply a DTF Transfer
Provide direct steps you can repeat on any heat press machine.
Preparation
- Pre press the garment 3–5 seconds to remove moisture.
- Lint roll and align centerline.
- Place transfer with heat resistant tape if needed.
- Use parchment paper or a guard sheet to protect the surface.
Positioning the transfer
- Measure distance from the collar.
- Smooth the film to avoid bubbles.
- Ensure transfer paper sits flat for even pressure.
Pressing
- Use the right temperature range for the fabric.
- Apply firm pressure only when specified, otherwise use medium pressure.
- Match press time to the chart, then lock the handle to maintain even pressure.
Peeling
- Follow the film guidance, hot peel or cold peel.
- If edges lift, re-cover and add one to two seconds of press time.
- Let thick seams cool completely before testing adhesion.
Post-press finishing
- Re-cover with parchment paper and press 3–5 seconds for a smooth finish.
- Inspect edges and fine lines.
- Allow the garment to rest before folding.
Summary
Use a consistent transfer process. Center, press, peel, and finish the same way every time for predictable results.
Benefits of DTF Heat Press
- Works on many different materials, including light fabrics and synthetic fabrics.
- Fast transfer process with minimal setup.
- Sharp detail on small text and fine lines.
- Durable final product when the right temperature and press time are used.
- Scales smoothly from t-shirts to hoodies and other materials.
Summary
DTF offers versatility and speed. With the right settings, dtf transfers work reliably across your product mix.
Troubleshooting DTF Heat Press Settings Issues
- Weak adhesion: Increase time in two second steps. Verify even pressure.
- Cracking after wash: Lower temperature, extend press time slightly.
- Edge lift: Add more heat or apply firm pressure on a second quick press.
- Color dulling: Reduce temperature, shorten time, check guard sheet.
- Scorching: Lower heat and use a fresh guard sheet.
- Film residue: Increase press time or allow a longer cool before peel.
Summary
Adjust one variable at a time. Start with temperature, then time, then pressure.
Essential Tips for Heat Press Settings
- Calibrate often. Check material temperature with a contact thermometer.
- Pre press to remove moisture and wrinkles.
- Use even pressure across the platen.
- Keep a log of recommended heat press settings by blank brand.
- For delicate fabrics, try lower heat and longer time.
- Avoid household iron for production jobs. A handheld press can work for tests, not for scale.
- Confirm adhesive powder cure on test swatches before large runs.
Summary
Small habits protect quality. Measure, document, and repeat.
Wrap-Up
The right temperature, time and pressure produce consistent, clean transfers in dtf printing . Start with the tables, verify with tools, and record every preset. Train your team to follow the same heat press process so your line runs smoothly from the first transfer to the last.
For hard goods, consider uv dtf transfer solutions. For growth and bulk capacity, explore wholesale dtf transfers to balance cost and throughput.
FAQs
How long should I press the transfer onto the fabric?
Typical transfer time is 10–15 seconds. Increase press time by one to two seconds if you see edge lift, then retest the peel time.
Do I need to pre-press the garment? What does it help with?
Yes. Pre press removes moisture and flattens fabric fibers so the film can adhere properly. It also improves heat distribution for optimal results.
What fabrics are best suited for DTF transfers?
Cotton, blends, and many synthetic materials work. Delicate fabrics need lower heat and careful press settings to protect the surface.
Can I use a home iron instead of a heat press?
A household iron does not provide consistent heat or even pressure compared to using a heat press . Using a heat press gives you control and repeatability that other methods cannot match.
Leave a Reply