How to Use DTF Transfers
DTF transfers have revolutionized the world of custom apparel and promotional products, offering a game-changing solution for businesses, hobbyists, and creatives alike. Whether you’re a business owner looking to produce branded merchandise, a hobbyist crafting personalized gifts, or someone exploring the possibilities of custom clothing, direct-to-film printing delivers unmatched versatility and high-quality results. This guide will walk you through everything you need to know about using DTF transfers, from understanding how they work to mastering the application process like a pro. With vibrant colors, durability, and the ability to print on a wide range of fabrics, DTF transfers are the ultimate tool for bringing your creative visions to life. Ready to unlock the full potential of DTF transfers? Let’s dive in and discover how you can create stunning, professional-quality designs with ease!
Table of Contents
ToggleWhat are DTF Transfers?
DTF transfers are a cutting-edge printing technique that brings your designs to life with precision and vibrancy. Using a DTF printer, your artwork is printed onto a special transfer film, then coated with a powder adhesive to ensure it adheres securely to fabric. What sets direct-to-film printing apart is its versatility—it works seamlessly on a wide range of materials, including cotton, polyester, and blends, making it ideal for everything from custom apparel to promotional products. Known for their vibrant colors, exceptional durability, and flexibility, DTF transfers are perfect for creating personalized t-shirts, hoodies, tote bags, and more. Whether you’re crafting unique gifts, team uniforms, or branded merchandise, DTF transfers deliver professional-quality results every time, ensuring your designs stand out and last.
Advantages of DTF Transfers
DTF transfers are extremely versatile, working on cotton, polyester, blends, as well as hard to press materials such as nylon. The DTF heat transfer allows for the vibrant color you get from sublimation with the soft hand of a screen print that will not compromise fabric feel. Durability wise, transfers last after frequent washes without cracking, fading, or peeling. The cold peel process continues to get softer with time, perfect for uniforms and high wear garments. With DTF printing, designs can be intricate, multi-colored, and without traditional screen printing constraints allowing for creative freedom with professional results.
Necessary Tools and Materials
The necessary tools for DTF transfer are a heat press which can set temperature and pressure. You’ll want DTF transfer film with pre-printed designs, Teflon sheets, and heat-resistant tape to hold transfers in place. Required materials include quality fabric such as cotton, polyester, or blends, and measuring tools for correct placement. Optional items include weeding tools, pressing pillows for textured surfaces, and lint rollers. Quality equipment, especially a reliable heat press, ensures professional results when you apply DTF transfers.
Step-by-Step DTF Transfer Process
Begin by setting your heat press to 320°F, using medium pressure, and preheat fully. Pre-press the fabric initially 5-10 seconds to extract creases and moisture. Turn the DTF transfer film to the reinforcement face downward, and use a heat-resistant tape to fix it on the fabric. Use firm, even pressure on DTF transfers for 15–20 seconds. Cool for 10-15 seconds and then remove the liner. Cover the design with a Teflon sheet and press again for 10-15 seconds to ensure the adhesive is fully cured for maximum durability.
How to Apply DTF Transfers?
Applying DTF transfers is a straightforward process that yields stunning results. Follow these steps to ensure a flawless application:
- Prepare Your Materials
Gather your DTF transfer, fabric, and heat press. Ensure the fabric is clean and free of wrinkles to avoid imperfections in the final design.
- Preheat the Heat Press
Set your heat press to the recommended temperature (usually around 320°F). Preheating ensures the adhesive activates properly, creating a strong bond between the design and the fabric.
- Position the Transfer
Place the DTF transfer on the fabric with the design facing down. Use a heat-resistant tape to secure it in place, ensuring it doesn’t shift during pressing.
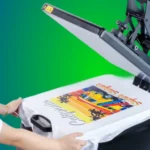
- Press the Design
Close the heat press and apply firm pressure for 10-15 seconds. The heat activates the powder adhesive, bonding the design to the fabric.
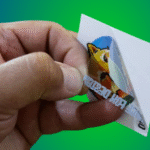
- Peel Off the Transfer Film
Carefully peel off the transfer film while it’s still warm. Be gentle to avoid damaging the design.
- Post-Press the Fabric
For added durability, post-press the fabric for another 10-15 seconds. This step ensures the design is fully set and enhances its wash resistance.
By following these steps, you can create vibrant, long-lasting designs with DTF transfers that stand out.
Tips for Using DTF Transfers Effectively
To get the most out of your DTF transfers and achieve professional-quality results, keep these expert tips in mind:
- Choose the Right Fabric
While DTF transfers work on a variety of materials, they perform best on cotton, polyester, and blends. These fabrics ensure optimal adhesion and print quality, giving your designs a vibrant and long-lasting finish. Avoid heavily textured fabrics, as they can interfere with the transfer process and affect the final result.
- Use High-Resolution Artwork
For crisp, clear prints with vibrant colors and fine details, always use high-resolution artwork (300 DPI or higher). This is especially important for direct-to-film printing, as it ensures your designs look sharp and professional, whether you’re creating custom t-shirts or promotional items.
- Optimize Your Heat Press Settings
Proper heat and pressure are key to successful DTF transfers. Always follow the recommended settings for your heat press—typically around 320°F for 10-15 seconds. Overheating or insufficient pressure can compromise the adhesion and durability of your design, so precision is crucial.
- Experiment with Placement
One of the best things about DTF transfers is their versatility. Don’t be afraid to get creative with placement! Try applying designs to sleeves, pockets, or the backs of garments to create unique, eye-catching looks. This flexibility makes DTF transfers perfect for everything from team uniforms to personalized gifts.
- Store Transfers Properly
To maintain the quality of your DTF transfers, store them in a cool, dry place. Proper storage prevents the powder adhesive from degrading and ensures your transfers are ready to use whenever inspiration strikes.
By following these tips, you can maximize the potential of DTF transfers and create stunning, professional-quality designs with ease. Whether you’re a seasoned pro or just starting out, these best practices will help you achieve exceptional results every time.
Troubleshooting Common DTF Transfer Issues
Common issues when pressing DTF transfers include poor adhesion due to low heat press temperature or excess moisture in fabric. Always pre-press garments to remove humidity. Design peeling after washing typically results from insufficient pressing time or temperature. Uneven coverage indicates inconsistent pressure distribution, make sure to check your heat press alignment. Design cracking can occur from overheating or excessive pressure. If DTF transfer film won’t remove cleanly, verify proper curing temperature and allow adequate cooling time before peeling.
Conclusion
DTF transfers are a versatile and high-quality solution for creating custom apparel and promotional items that truly stand out. With their vibrant colors, exceptional durability, and ease of application, they’re the go-to choice for businesses, hobbyists, and anyone looking to bring their creative ideas to life. Whether you’re crafting custom t-shirts, hoodies, tote bags, or unique gifts, DTF transfers deliver professional-quality results every time, ensuring your designs are as durable as they are eye-catching.
Ready to take your creativity to the next level? Explore our DTF gang sheet builder to unlock even more possibilities, allowing you to combine multiple designs onto a single sheet for maximum efficiency and versatility. With the right tools, techniques, and a bit of imagination, you can master the art of direct-to-film printing and create stunning, personalized designs with ease. Start your DTF transfer journey today and transform your ideas into wearable art!
FAQs
What Do I Need to Start Doing DTF Transfers?
You will need a high quality heat press that goes to 320°F, preprint images on DTF film, Teflon sheets and heat tape. You’ll also need high quality materials such as cotton, or mixes of polyester, as well as tools to measure for perfect placement.
How Can I Make My Own DTF Transfer at Home?
The process of making DTF transfers requires that you have special equipment like a DTF printer, special inks, transfer film, and powder adhesive at your disposal to start in this particular type of printing. However, purchasing pre-made DTF heat transfers is more cost-effective for most users than investing in expensive printing equipment.
What Is the Process of DTF?
The DTF process involves printing designs onto DTF transfer film, applying powder adhesive, then curing with heat. To apply DTF transfers, position face-down on fabric and press at 320°F for 15-20 seconds, then cold peel the film.
Why Is My DTF Not Sticking to My Shirt?
Common reasons for low adhesive bonds are low heat press temperature, low pressure, or excess moisture content in the fabric. Be sure to set your heat press to 320°F, use heavy pressure for 15-20 seconds and pre-press your garment to remove excess moisture prior to applying your transfer.